Cloud Data Services
The Cloud Data Services (CDS) software is a cloud-based platform that allows users to visualize, create alerts, store, and analyze critical data collected by Banner wired and wireless devices.
Watch this video to learn how to configure a DXM controller to push data to Banner’s Cloud Data Services (CDS) using an Ethernet connection.
This is a demonstration of how to configure a DXM controller to push data to Banner's Cloud Data Services, using an Ethernet connection.
For this process, you will need the following equipment: a DXM controller with Ethernet communication; an internet connection via Ethernet; an active CDS account; sensors or other components with data to push; and an M12 to Ethernet data cable.
To begin, connect the controller to the DXM configuration software on a windows PC using a USB or Ethernet connection.
Once you're connected to the software, navigate to the DXM menu, select Get Configuration, and save the XML to your PC.
Next, proceed to the Local Registers section. Note that the DXM must have data available in the local registers in order to push it to the Cloud.
You will need to set the Cloud settings to read for each register that you wish to push to the Cloud.
If you need to push multiple registers, you can modify them all at once.
To do this, navigate to the Modify Multiple Registers tab at the bottom of the window.
Select your starting and ending registers. Select Set from the Cloud Settings dropdown menu, and select Read from the subsequent menu.
Click Modify Registers to complete the change. Proceed to the Settings section and select the Cloud Services tab.
The Push method should be set to HTTP Cloud Push and the Push interface should be set to Ethernet.
Next, select the Cloud push interval that you would like for your application.
Note that a shorter interval will cause you to reach the data cap for your CDS plan sooner.
CDS data plans are measured in data points per hour, so you will need to ensure that your plan can handle the amount of data you will be sending each hour.
Refer to the Banner website for more information on the data plan caps.
You can also use the Service Plan calculator to help you select the best plan for your application needs.
Navigate to the Ethernet tab and set the IP address for your controller, along with the necessary settings for your application.
For this example, the DXM has been set to a DHCP connection.
If your controller has an LCD display, it's a good idea to verify that its connection method matches the configuration.
To do this, navigate to System Config and then to Ethernet, and verify that DHCP is on.
Next, proceed to the Banner CDS portal and log in.
Under the Gateway section select Add New Gateway.
Enter a gateway name and select the company. Next, select and copy the GUID, which will be pasted into the DXM software later.
Click submit to save the gateway and return to the DXM software.
In the Cloud Services section, paste the GUID into the Gateway ID field and then save and send the configuration to the controller.
Return to CDS and click Edit on the gateway that you submitted earlier.
Upload the XML file that you just wrote to the controller.
Select Update and Overwrite, and click Submit.
Lastly, connect your DXM to your network and it will start pushing the data upon its next interval.
That covers the basic process for setting up data pushes from a DXM controller to Banner CDS.
For more information, reach out to Banner Engineering.
The Cloud Data Services (CDS) software is a cloud-based platform that allows users to visualize, create alerts, store, and analyze critical data collected by Banner wired and wireless devices.
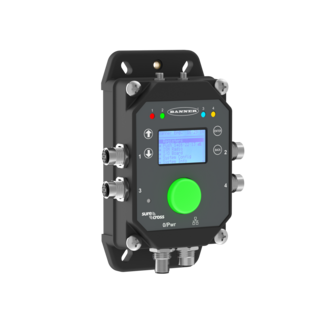
Banner’s DXM1200 IIoT Gateway wireless controllers collect and process condition monitoring data from nearly anywhere, then sends anywhere in the world.