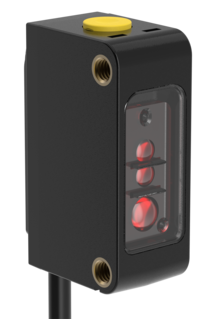
Q20-2 Compact Sensor
Banner’s Q20-2 Compact Sensors provide consistent, reliable photoelectric sensing in a universal, compact form factor designed for global manufacturing.
This brief video covers the basics of how to program the Q20-2 Laser Measurement Sensor.
This is a quick how-to video that will cover the basics of programming the Q20-2 Laser Measurement Sensor from Banner Engineering.
The Q20-2 is an infrared laser diffuse sensor with the visible red alignment aid and a range of 20mm to 3m.
It can be taught using the push button on top of the housing, or using the remote input wire, or IO-Link.
There are two types of interactions with the button: a long press and a short press.
A long press is when you press the button for two or more seconds.
A short press is when you press the button for less than two seconds.
If you need to cancel the teach process at any time, just perform a long press until the LEDs begin to flash alternately.
The default teach mode is 2-point Teach. To initiate the teach process, perform a long press of the button until the LEDs flash in unison.
Present the first target and perform a short press to set the first condition.
The LEDs will start double flashing to indicate that it is ready for the second condition.
Present the second target and perform another short press.
The LEDs will flash a specific number of times to communicate the results of the teach process, based on the table provided in the manual.
For example, three flashes indicate that the switch point has been successfully set between the two taught conditions.
There are three other modes available in the Q20-2: One-Point Object Set, One-Point Window set, and Dual Mode.
Refer to the manual for additional information on each of these teach modes.
For this example, we will set the sensor to Dual Mode.
To initiate the teach mode selection, begin by performing a long press until the LEDs start flashing.
Then perform three short presses. This begins the teach mode selection process, which is indicated by the LEDs triple flashing.
Select the desired mode by performing another series of short presses, based on the teach mode selection table in the manual.
For Dual Mode, perform four short presses.
The resulting LED behavior will confirm which mode has been selected based on the previously mentioned table.
Dual Mode measures for changes in both distance and light intensity with respect to a fixed reference background.
Initiate the teach process by performing a long press.
Present the fixed background and perform a short press.
Upon a successful teach, any object that passes between the sensor and the reference target will be detected.
The alignment LED provides a bright, visible light to ensure that the sensor is properly positioned for the application.
The LED is on by default, but it can be turned off using IO-Link or the remote input wire.
To deactivate it using the input wire, begin by sending a 24 volt signal pulse to the wire seven times.
The LEDs will start repeatedly flashing seven times.
When at this stage, pulse the input wire once to turn the alignment LED off.
To turn the LED back on, follow the same process and pulse the input wire twice at the last step.
That covers the basics of programming the Q20-2 Laser Measurement Sensor.
For more information, reach out to Banner Engineering.